PHISH3D Simulations
Simulations are great for basic - one off campaigns that utilize a single phishing template.
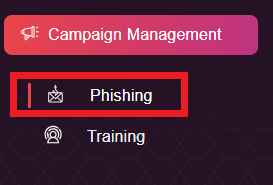
1. Clicking on the Phishing Sub-module will guide you into the Phishing Campaigns menu.
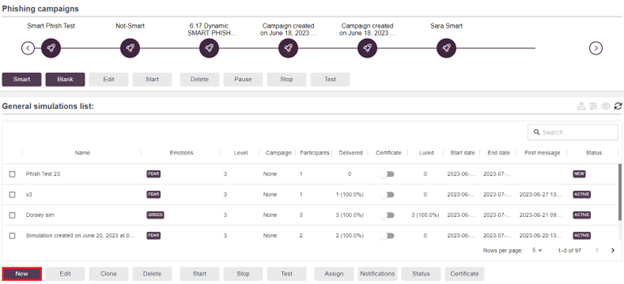
2. Click “New” to start the configuration process in the phishing Campaign view.
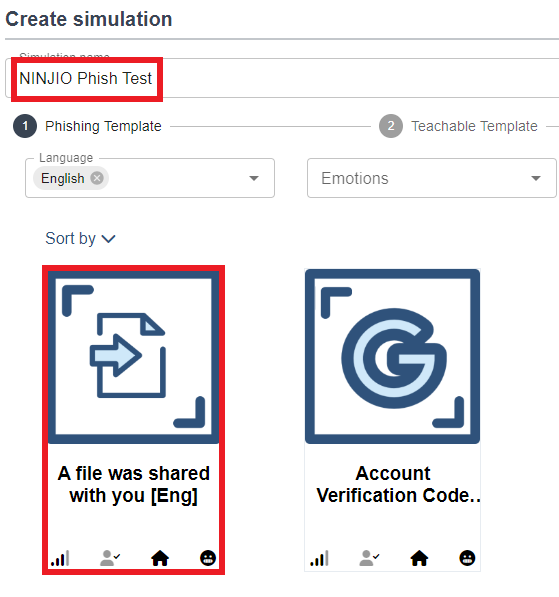
3. In the Create Simulation page, rename the simulation name, select your phishing template, and hit “Next.”
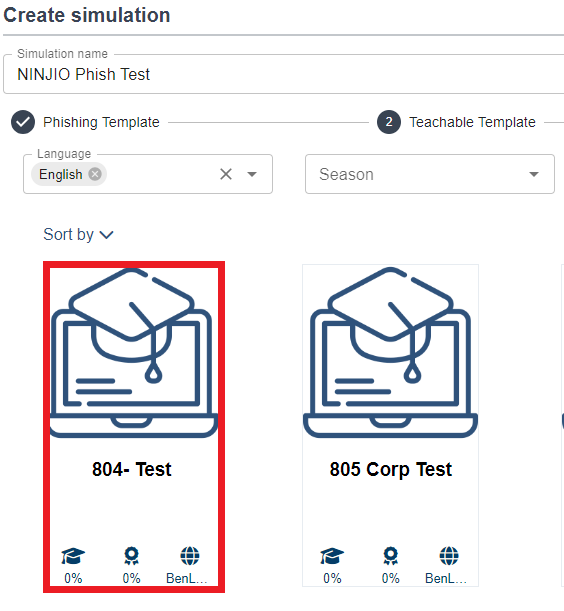
4. Once you have selected your phishing template, choose a teachable template if you require one and hit “Next.”
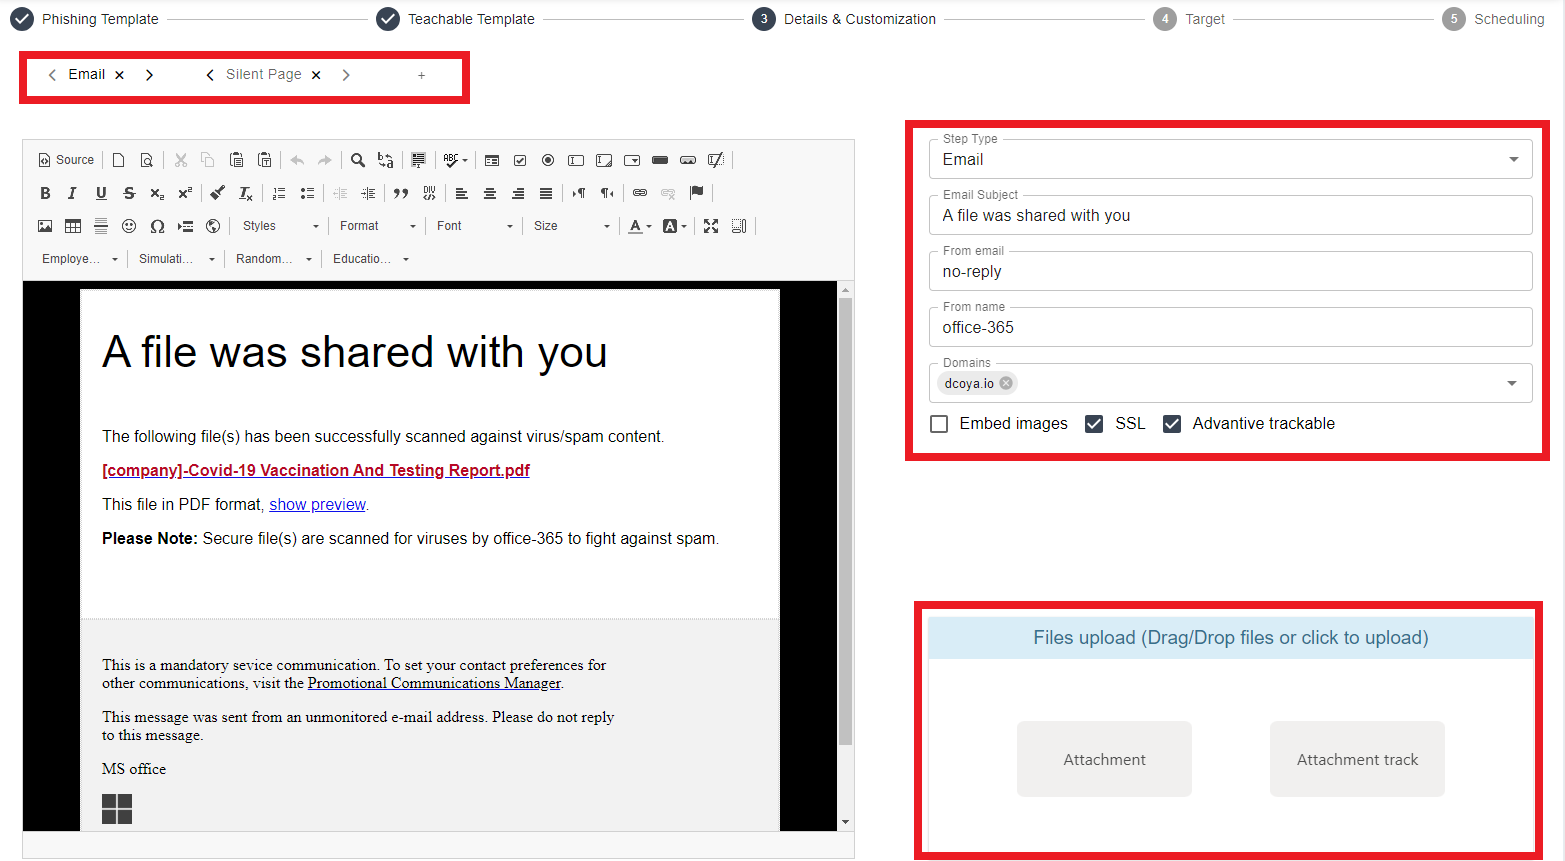
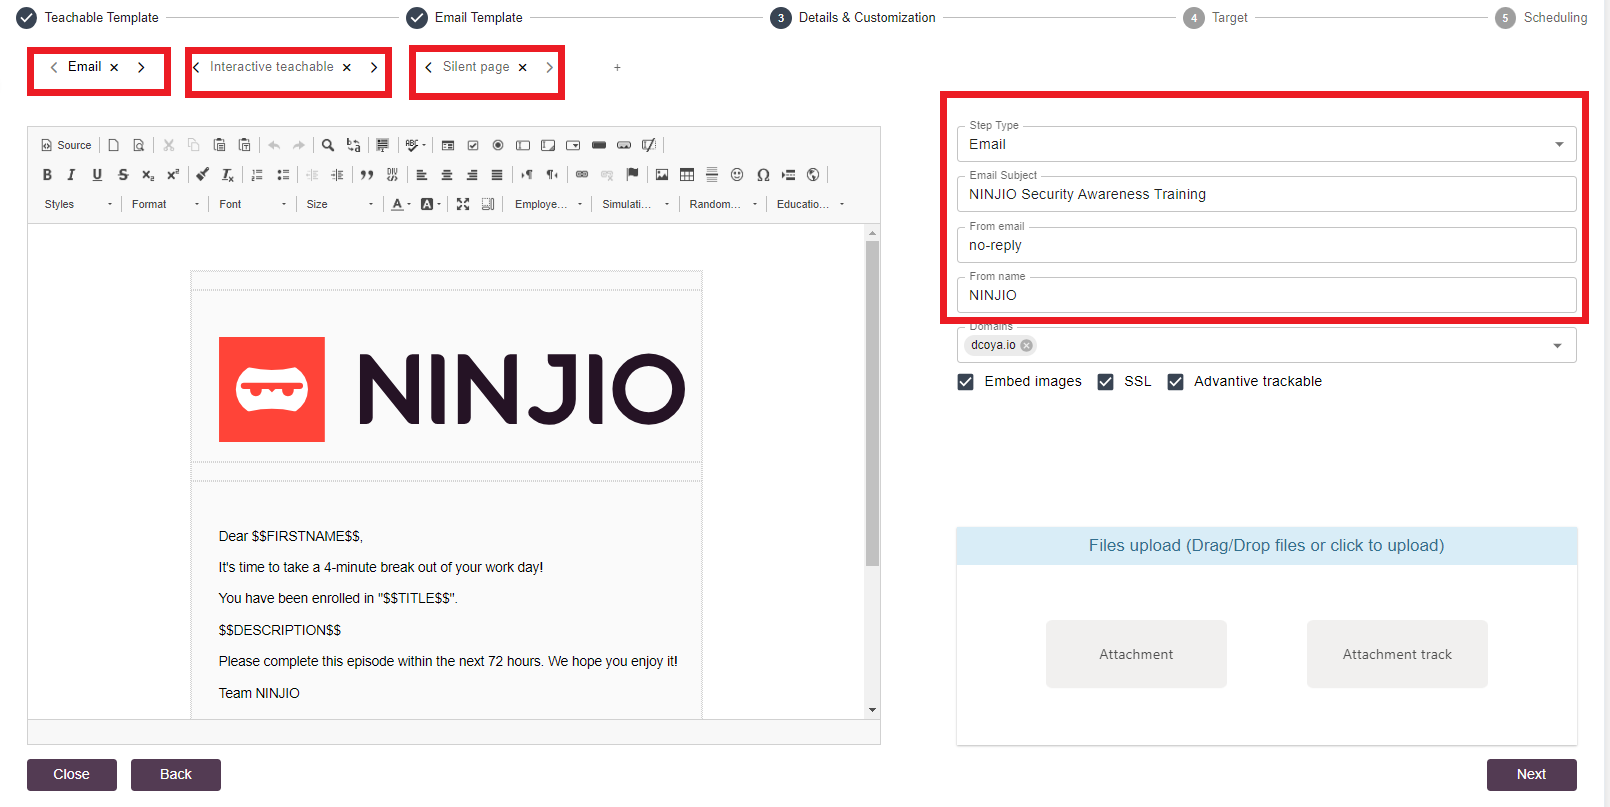
5. In the Details & Customization page, you can update information in the Email Subject line, From Email, and From Name. You also can edit the domains associated with the template and enable SSL, Embed images, and upload attachments files. If you need to make other modifications, such as to the Interactive teachable and the Silent page, click the tabs to view the menu options. Once all is confirmed, hit “Next”.
6. On the next page, select your audience to receive this phishing campaign. You can choose by Groups, Dynamic Groups or Employees.

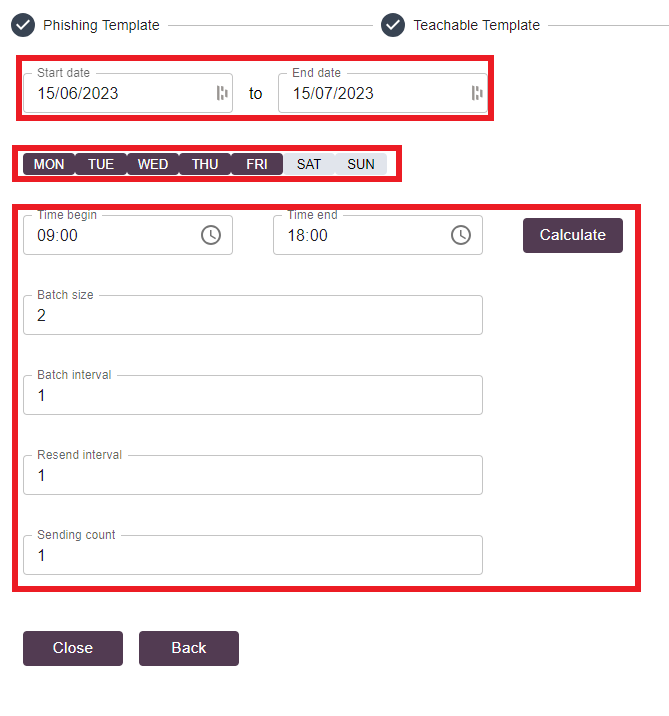
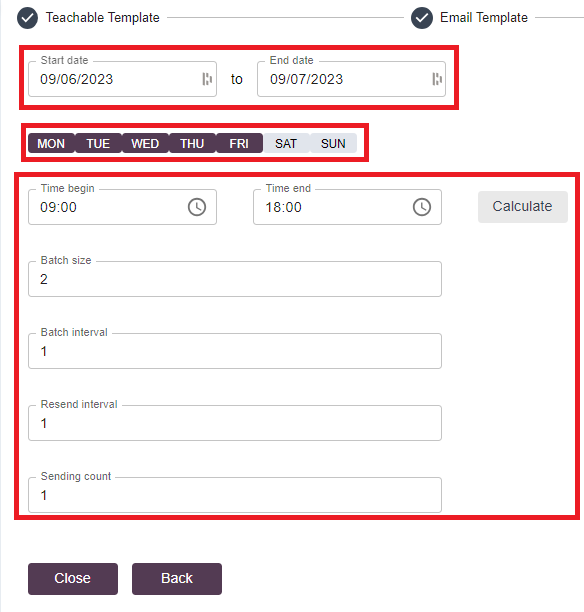
7. On the final page, “Scheduling,” you can select the date, time, and batch frequency to launch the training. Once you have adjusted the fields, you can hit “Finish”.
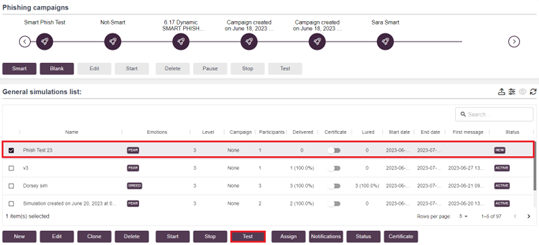
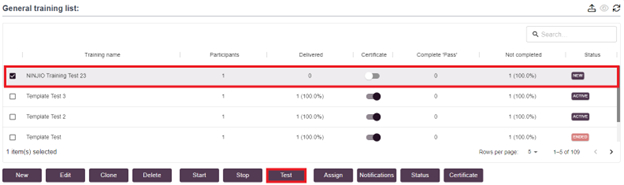
8. Once the Phishing Campaign has been configured, you will want to test it by selecting the campaign and hitting the “Test” button. (Note** You will see the status change from “New” to “Testing” when you do this action.)
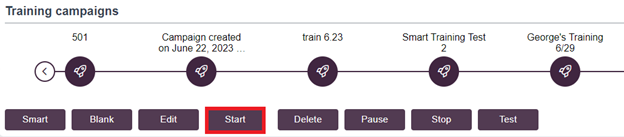
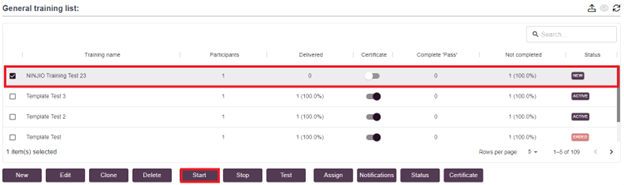
9. You can hit the” Start” button after confirming the testing. (Note**This will take the phishing campaign out of the idle state into the “Scheduled” or “Sending” state.)

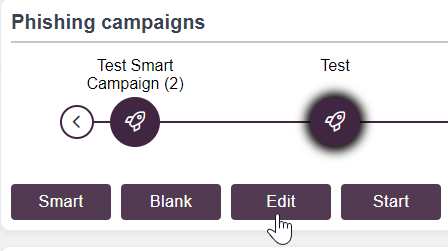
10. You can modify when the links deactivate on a campaign by clicking the "Edit" button on a campaign.
11. By clicking the checkbox below, you can specify how many days the campaign links are active for after the campaign ends.

Smart PHISH3D Campaigns
Smart PHISH3D Campaigns allow you to select multiple phishing templates simultaneously that can be launched and matched by level and emotions.
Below is a demo that shows how to administer a smart campaign that matches users to various phishing templates based on their user level.
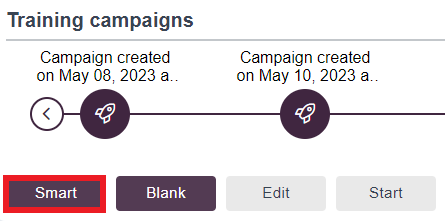
1. You can create a Smart Phishing Campaign by going into Campaign Management--> Phishing and selecting the “Smart” button in the upper left-hand corner.

2. Select your audience. You can select Groups, Dynamic Groups, or Employees for Smart Phishing Campaigns. After you make your selection, hit “Next.”
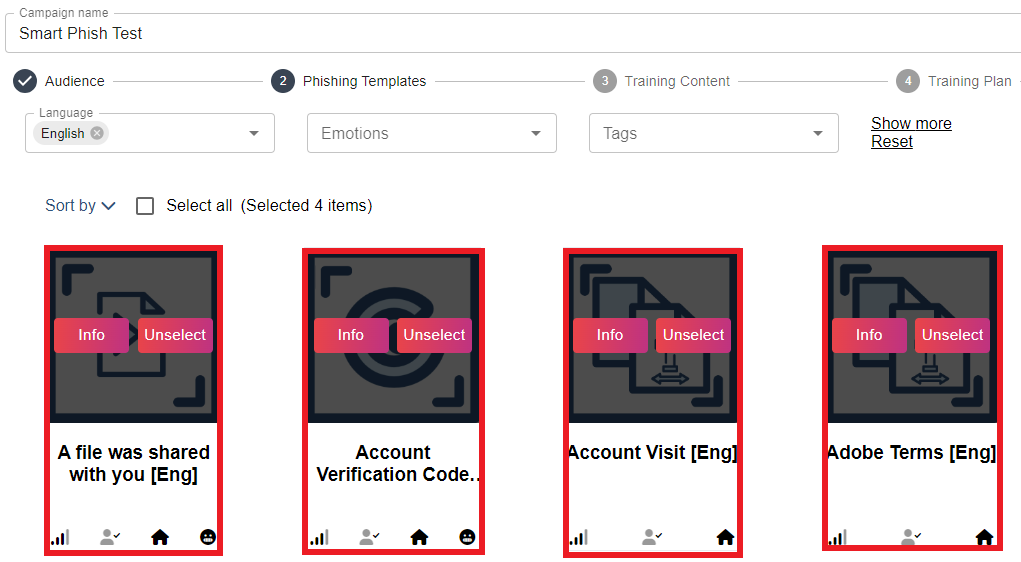
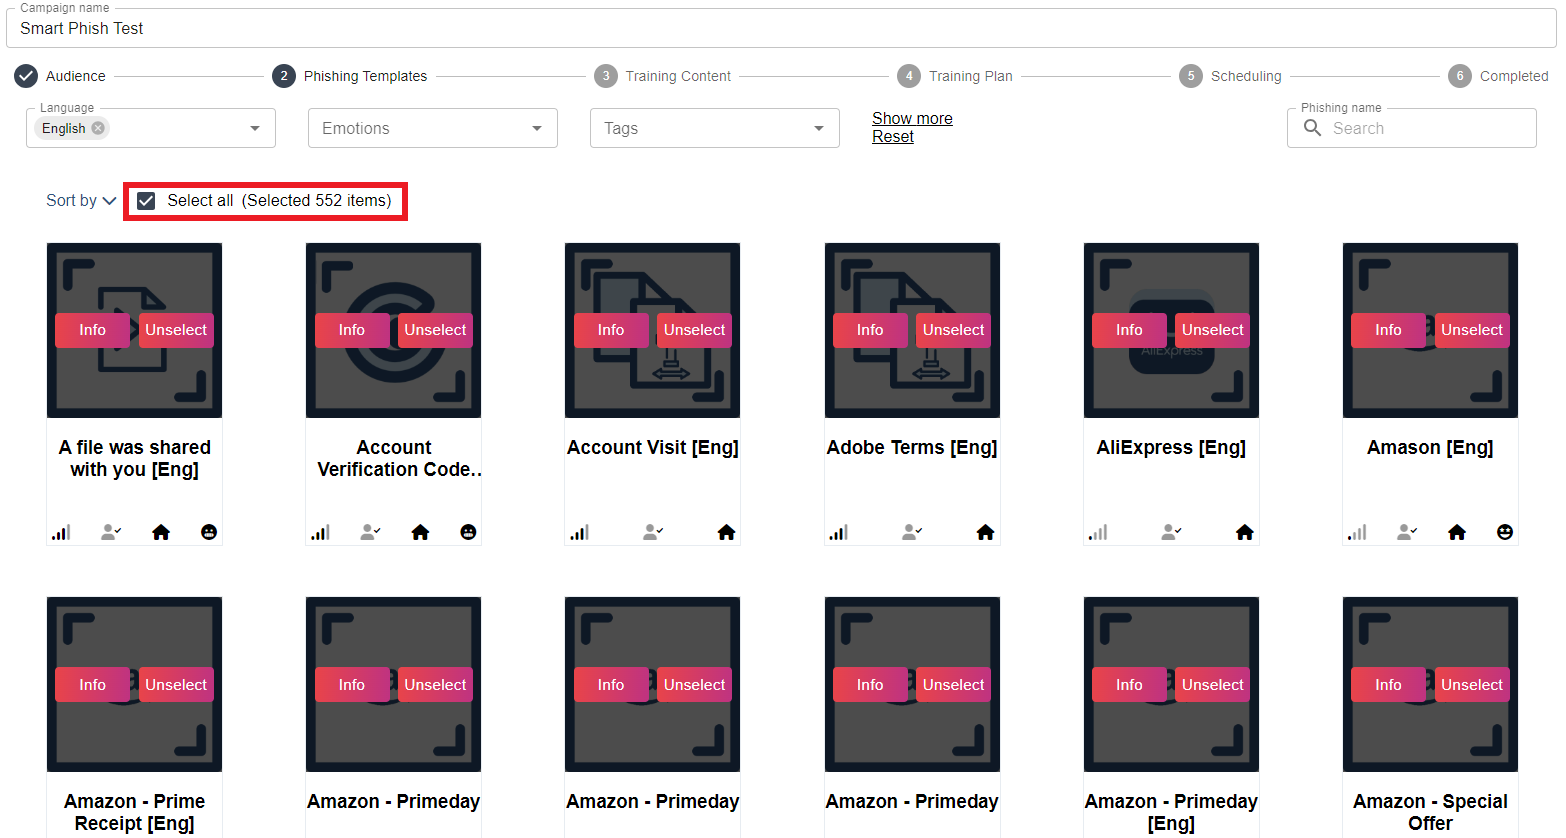
3. On the Phishing Templates page, select the templates you want to utilize and hit “Next”.
(Note** All templates will be selected by default. You can disable the “Select All” button to narrow down your choice.)
4. Select the Training Content you want to be associated with the templates and hit “Next.”

5. In the Training Plan page, it allows you to use the matching feature where you can match based on parameters with Simulations per employee, Maximum templates to use, Phishing matching mode, and Training matching mode. These options can be modified and used to match on level, emotions, training, and without training. You can select the “Match” button to randomize and distribute training and templates based on these guidelines. Once all is confirmed, hit “Next.”

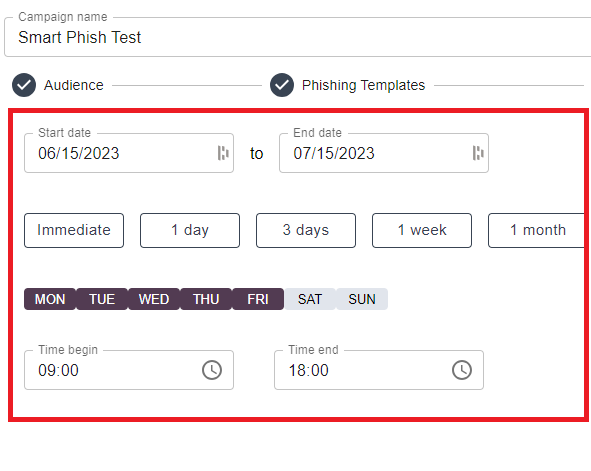
6. On the Scheduling page, you can select your Date/time and Frequency options. After this has been confirmed, hit “Next.”
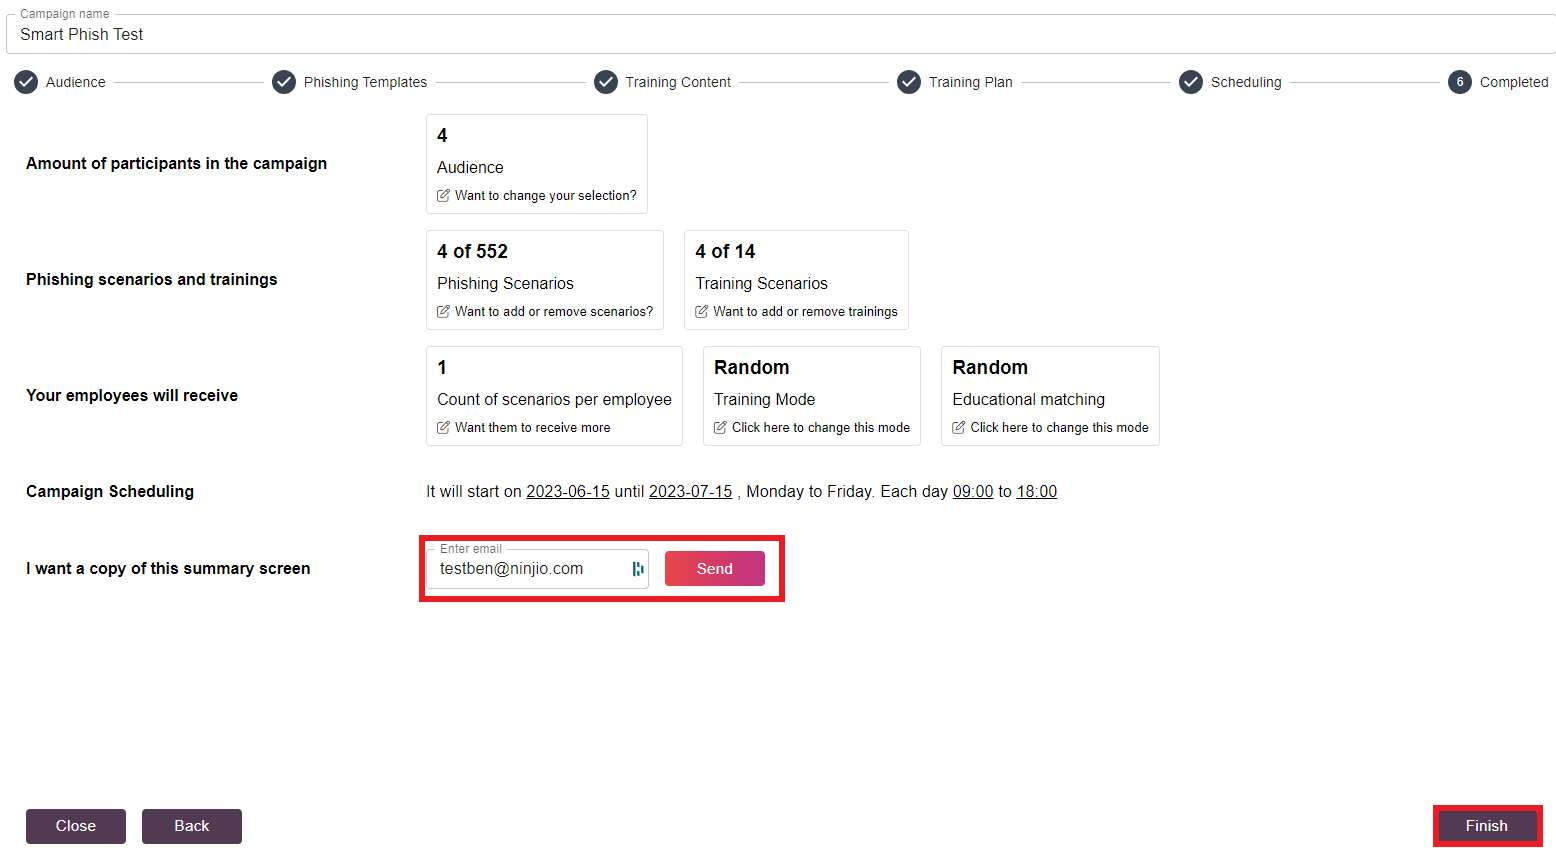
7. On the Completed screen, verify your campaign’s configuration and then hit “Finish.” (Note* You can send a Copy of the Summary to your email before finishing the details on this page.)
8. To locate your new Smart Phishing Campaign, use the Launch Timeline and click all the way to the right. It will be the latest updated campaign. Once Selected, it will display all the simulations in an Idle state.

9. To enable the launch trigger for the simulations, select the “Start” Button beneath the Launch Timeline. (NOTE** Before enabling the launch trigger, you can make any modifications per simulation by selecting the simulation individually and reviewing the options for “Edit” options. This will also change the status of these campaigns from “New” to “Active”, “Sending”, or “Scheduled” depending on sending configuration.
Training Simulations
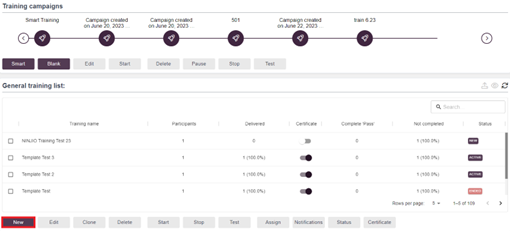
1. To launch training campaigns, go to Campaign Management > Training.

2. Click “New” to start the configuration process in the Training Campaign view.
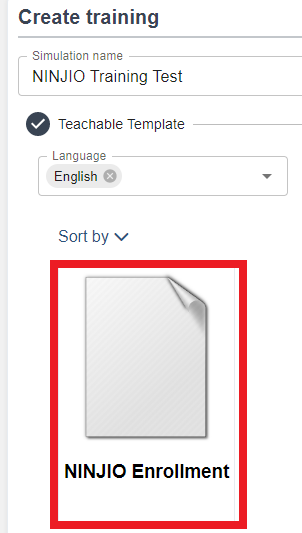
3. In the teachable Template page, rename the simulation name, select your training, and hit “Next.”

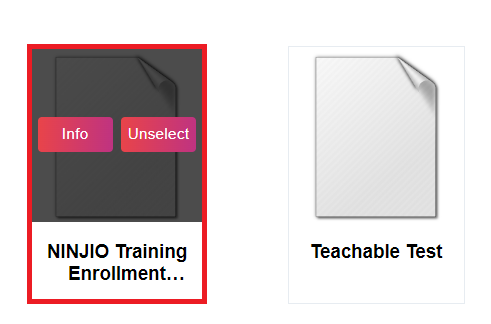
4. Select the NINJIO Enrollment template and hit “Next.”
5. In the Details & Customization page, you can update information in the Email Subject line, From Email, and From Name. If you need to make other modifications, such as to the Interactive teachable and the Silent page, click the tabs to view the menu options. Once all is confirmed, hit “Next”.
6. On the next page, select your audience to receive this training campaign. You can choose by Groups or Employees. (Note** Dynamic groups are utilized for Smart Campaigns.)
7. On the final page, “Scheduling,” you can select the date, time, and batch frequency to launch the training. Once you have adjusted the fields, you can hit “Finish”.
8. Once the Training Campaign has been configured, you will want to test it by selecting the campaign and hitting the “Test” button. (Note** You will see the status change from “New” to “Testing” when you do this action.)
9. You can hit the” Start” button after confirming the testing. (Note**This will take the training campaign out of the idle state into the “Scheduled” or “Sending” state.)
Smart Training Campaigns
Smart Training Campaigns allow you to select multiple training episodes simultaneously. This is the function used for setting up Core 4 training.
1. You can create a Smart Training Campaign by going into Campaign Management--> Training and selecting the “Smart” button in the upper left-hand corner.
2. In the Training menu, select your Core 4 training episodes and hit the “Next” button.

3. Select your training enrollment email template in the Email Template Menu and hit “Next.”
4. During the Sending Configuration, you can select your frequency options for the Core for configuration. You can send: All at once, Once a month, Once a week, and Once a day.
-You also will need to select the Date, Day(s) of the week and time.
-Once all is confirmed, hit “Next”.

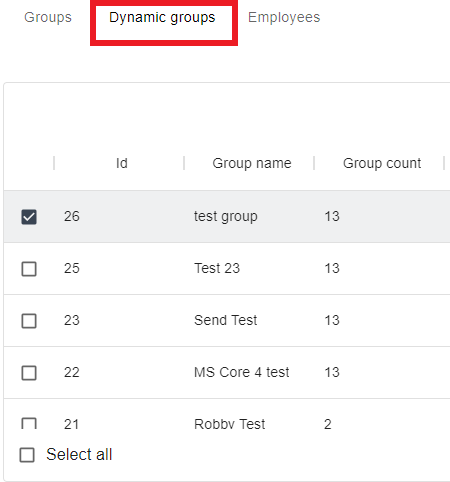
5. When selecting your audience, you want to utilize Dynamic groups. These groups are your target groups that have auto-enroll configured for them.
6. On the approval screen, verify your campaign’s configuration and then hit “Finish.” (Note* You can send a Copy of the Summary to your email before finishing the details on this page.)

7. To locate your new Smart Training Campaign, use the Launch Timeline and click all the way to the right. It will be the latest updated campaign. Once Selected, it displays all four trainings in an Idle state.
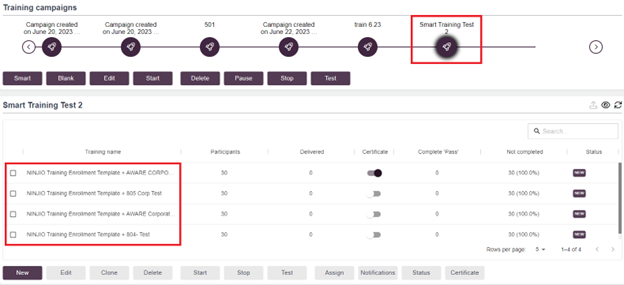
8. To enable the launch trigger for all four pieces of training, select the “Start” Button beneath the Launch Timeline. (NOTE** Before enabling the launch trigger, you can make any modifications per training by selecting the training individually and reviewing the options for “Edit”, “Notifications,” and “Certificates.” This will also change the status of these campaigns from “New” to “Active”, “Sending”, or “Scheduled” depending on sending configuration.
If you have any questions, please reach out to support@ninjio.com.
Comments
0 comments
Please sign in to leave a comment.